
Fill in Visit Japan Web before you fly and show one QR code on arrival — it merges immigration and customs into a single scan. After landing I used the self-service kiosk: scan passport, confirm, fingerprints, photo, about three minutes, then the priority lane. Screenshot the QR code, because airport Wi-Fi may not connect.
1. What Visit Japan Web is
Visit Japan Web is the Japanese government's online immigration and customs declaration system. Fill it in on your phone before departure and show a QR code on arrival — no handwriting, no borrowing a pen mid-flight, no crouching in a corner of the arrivals hall to finish a form.
The paper arrival card and customs declaration still exist. If you have not filled in VJW in advance, you can still ask the cabin crew for the paper versions. The two systems run in parallel, but the electronic one is noticeably faster.
Official site: vjw.digital.go.jp. Language can be switched in the top-right corner.
2. Filling it in, in five steps
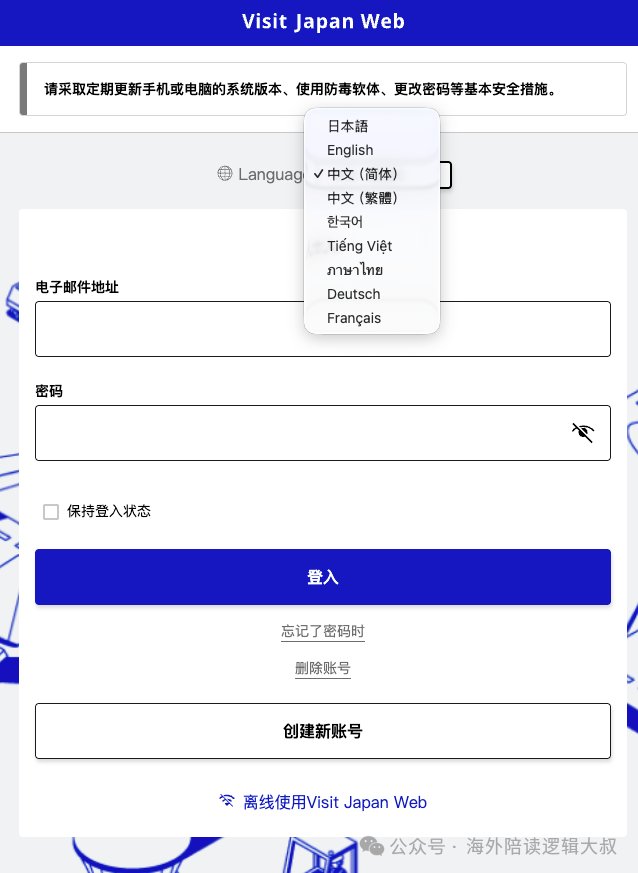
Step 1 — Create an account
Click Create new account and enter an email address and password. The password needs upper case, lower case, digits and a symbol, so it is a little fussy. A verification code is emailed to you; enter it and you are logged in. This step is no harder than signing up for any website.
Step 2 — Your own details
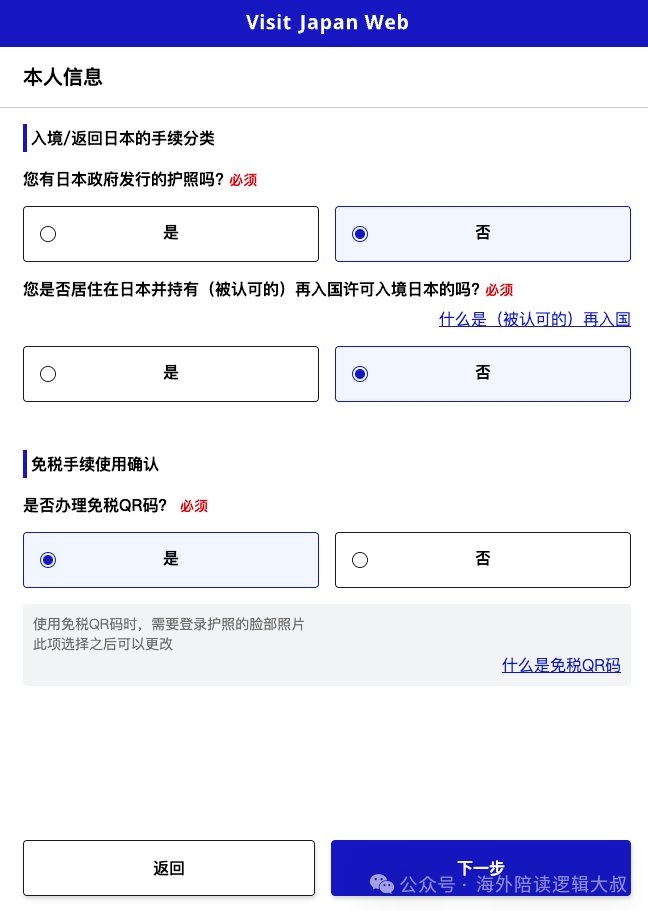
On the homepage there is a My details button. The system first asks three questions — essentially "do you hold a Japanese passport?", "do you have a re-entry permit?" and so on. Answer no to all of them; you are a foreign visitor.
Then enter your passport details: name, nationality, passport number, date of birth, expiry date. Copy them from the passport.
The system offers a camera-reading function that theoretically fills the form automatically. In practice the recognition rate is poor — three or four attempts and it still does not match. Typing is faster.
There is also a tax-free QR code you are supposed to show at Japanese duty-free shops. It needs the same passport scan, recognises just as badly, and most shops do not even look at it — they simply want your passport. Skip it entirely.
Step 3 — Register your trip
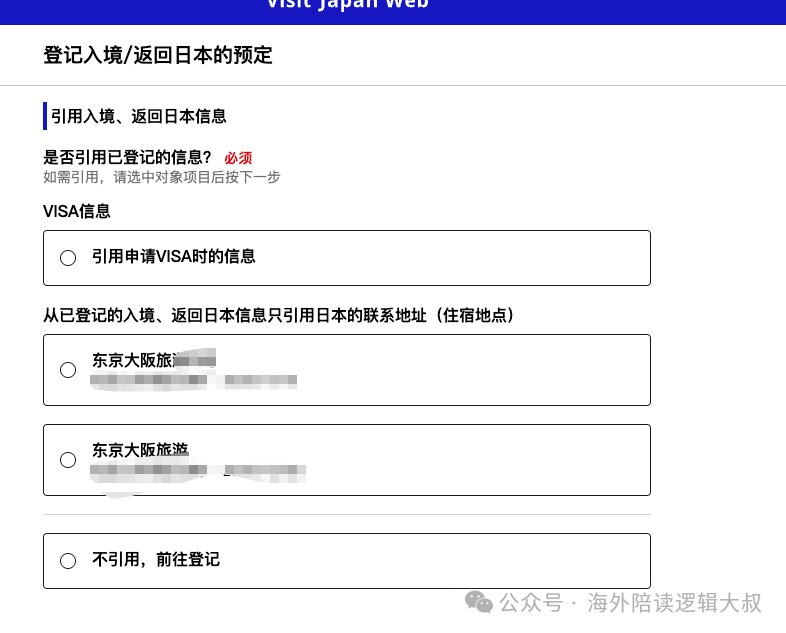
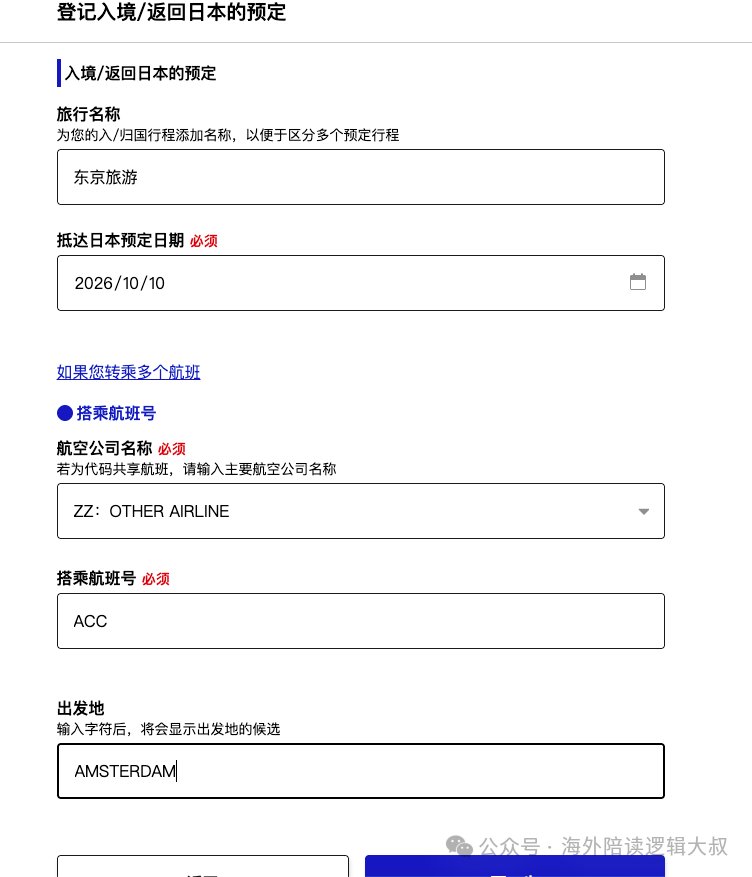
Back on the homepage, scroll down and find the blue Register new entry/return button. This is where you enter the basics of your trip: arrival date, flight number and where you are staying in Japan.
The flight number is on your ticket or itinerary — copy it across.
There is an option to import your visa application data. Recognition is unreliable and it causes more confusion than it saves. Skip it and fill the fields manually.
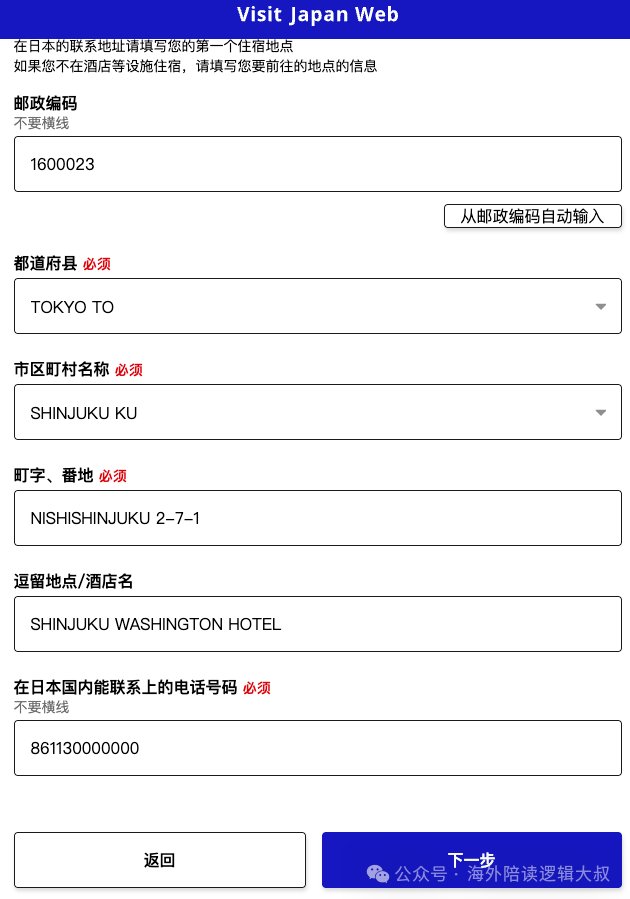
The hotel address is where most people get stuck. The form wants a Japanese contact address broken into postal code, prefecture, city/ward and block number. It looks intimidating, but there is only one sensible method: search the hotel name in Google Maps and copy the full address from the address bar. The postal code can be auto-detected once you enter it.
Use your own phone number for contact — anything that reaches you is fine. Chinese mobile numbers need the +86 prefix. An example address: 2-7-1 Nishi-Shinjuku, Shinjuku-ku, Tokyo.
Step 4 — Immigration and customs declaration
Once the trip is registered, open it and you will see an Immigration and customs declaration button. The questions are the familiar ones: where you came from, purpose of visit (choose sightseeing), how long you are staying, whether you are carrying prohibited items, whether you are carrying goods above the duty-free allowance. Answer honestly; for the declaration questions the answer is normally "no" unless you genuinely are carrying something.
The system then generates a QR code. That single code covers both immigration and customs — one scan does both.
Step 5 — Screenshot it
This step is easy to overlook and genuinely important: screenshot the QR code page and save it to your photo album.
Why? Once you land in Japan, the airport Wi-Fi may not connect and your mobile signal may not work either. If the VJW site will not load, you are stuck. A screenshot opens instantly and needs no connection at all.
It is also worth logging in once more before departure to confirm your trip details are correct and the QR code displays properly — rather than discovering a problem at the airport.
3. Travelling as a family
One VJW account can register multiple companions. On the homepage, click Family members travelling with you and enter their passport details.
Note that immigration and customs are separate declarations for each person, so you must generate an individual QR code for everyone. Be careful not to mix up the screenshots — label them by name.
4. What happens after you land
Head towards immigration. In recent years Narita, Haneda, Kansai and Fukuoka have installed shared self-service kiosks.
Look for the ATM-like machines in the corridor, hold your QR code to the scanner and follow the on-screen prompts: scan passport, confirm details, fingerprint, photograph. The whole process takes about three minutes, after which you can use the dedicated priority lane instead of the normal queue.
If your airport does not have these kiosks, queue at a staffed counter as usual — the officer will scan your QR code. Either way it is faster than the paper form.
Log in to VJW, confirm the trip details are correct, confirm the QR code displays, confirm the screenshot is in your album. It takes under a minute and removes a lot of stress on arrival.
5. Key points
- Do it before you fly, not on the plane
- Do not scan your passport with the camera — typing is faster
- Ignore the tax-free QR code
- Copy the hotel address from Google Maps rather than typing Japanese
- Screenshot the QR code so it works without a connection
- One account covers the whole family, but each person needs their own code
Frequently asked questions
Is Visit Japan Web free?
Yes. The official site is vjw.digital.go.jp; any paid third-party service is unnecessary.
Can I enter without filling it in?
Yes. Paper arrival and customs forms are still available from the cabin crew — it is simply slower.
Does the QR code expire?
The code is tied to your registered trip. If your flights or dates change, register the trip again, and log in once before departure to confirm.
Do children need separate registration?
Yes. Add them under family members within the same account, but generate a separate QR code for each person's immigration and customs declaration.